How to write a children’s book is a question many aspiring authors ask. Some assume that writing for kids is easier than writing for adults. But as Mark Haddon, author of The Curious Incident of the Dog in the Night-Time, put it, “writing for children is bloody difficult…”
A truly great children’s book needs to be engaging, age-appropriate, and imaginative—all while maintaining clear language, a meaningful message, and captivating storytelling.
Maybe your inspiration comes from bedtime stories with your little ones or a childhood dream you held onto. No matter where your idea begins, creating a children’s book requires a lot of thought and creativity.
While the advice in this blog post applies to all children’s books, it’s especially useful for those writing board books, picture books, and early readers. Here’s how you can turn your idea into a children’s book.
How to Write a Children’s Book in 10 Simple Steps
Every beloved children’s book started with one small idea—and a plan to shape it into something unforgettable. These nine steps will guide you through the process, from drafting to completing your story.
1. Define Your Target Audience
Before you put pen to paper, you need to know who you’re writing for.
The world of children’s books is vast, ranging from sturdy board books for babies to complex middle-grade novels for preteens. Each category has different expectations, language levels, and styles, so understanding where your book fits is the first step.
Choose Your Age Group
Children’s books are categorized by age:
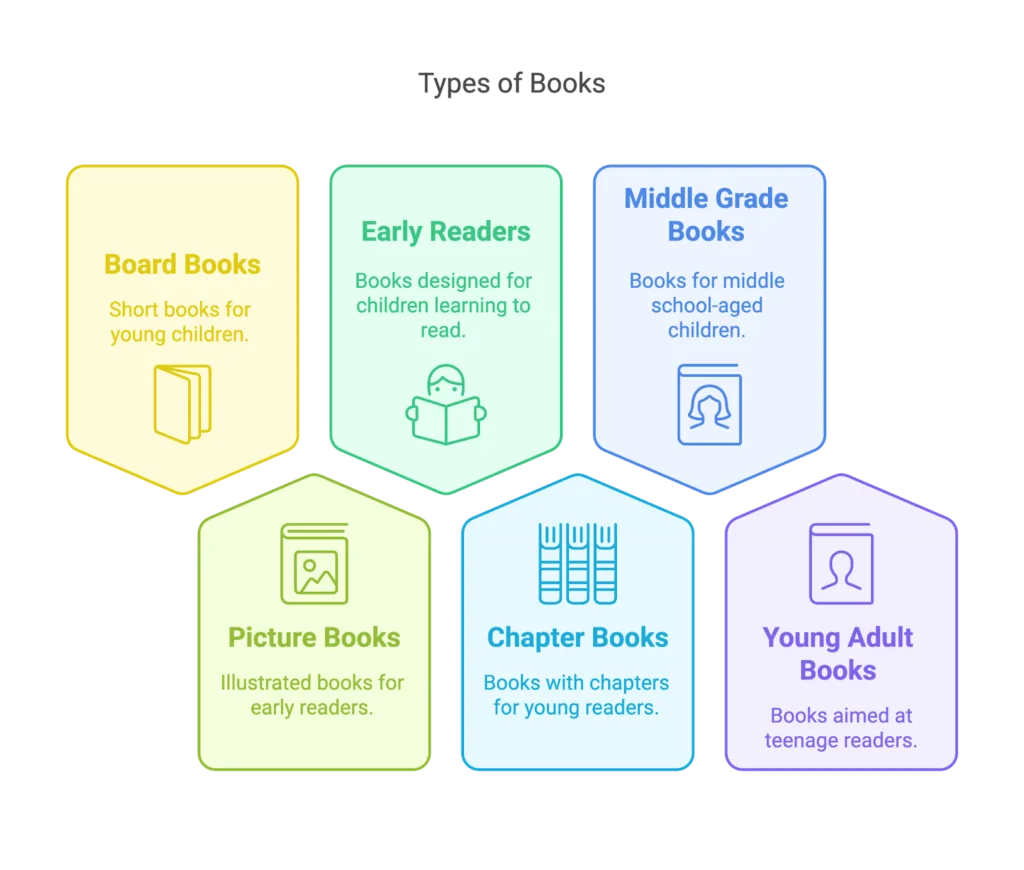
Board Books (Ages 0-3). These are short, sturdy books with simple words and bright pictures. Many incorporate interactive elements like textures, flaps, or mirrors to engage little hands and eyes. They introduce basic concepts like colors, numbers, and animal names.
Picture Books (Ages 3-7). Picture books rely on illustrations to tell the story. As such they are popular with kids. Any children's book depends on visuals, but a picture book tells the whole story through rich illustrations. Think of classics like Goodnight Moon or The Very Hungry Caterpillar.
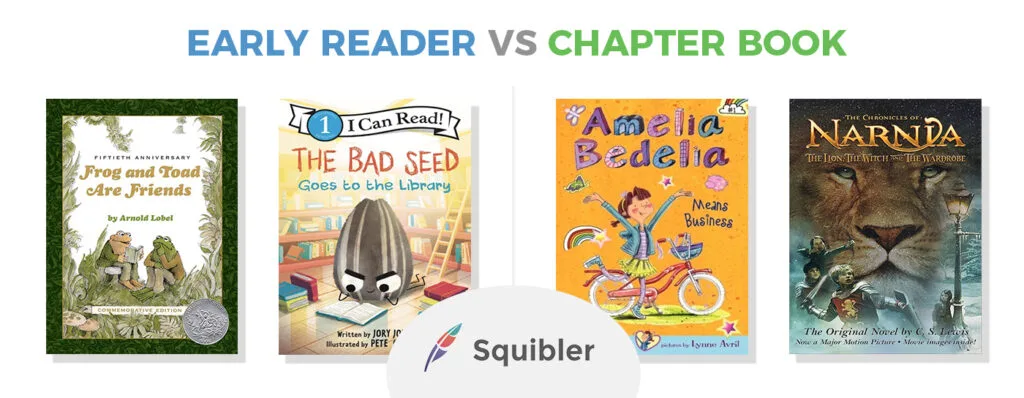
Early Readers (Ages 5-9). First reading books have simple dialogues, descriptions, and an easy story to follow along. The goal is to entertain the child while teaching them how to read. Such books are also a great transition between picture books and simple chapter books.
Chapter Books (Ages 7-10). Chapter books start to cut short on illustrations and replace it more and more with text. As the name implies, it also introduces chapters. Finally, the stories get a bit more complex and some might even include more developed characters. Examples are Magic Tree House and Junie B. Jones.
Middle Grade (Ages 8-12). Middle grade books are often where young readers meet true stories and detailed character development. Such books cover real-world issues, friendships, and adventure. Percy Jackson and The Babysitters Club are nice examples.
Young Adult (YA)(Ages 13-18). Young adult books cover mature themes, such as self-discovery. They tackle topics like identity, mental health, and social justice. Some examples are The Hunger Games and The Fault in Our Stars.

Understand Your Audience
Now that we have the basic idea of different book types, I'll go over basic tips for understanding your audience:
Like with any book type, read books in your target category. Take notes on tone, structure, vocabulary, and how the story unfolds.
Observe how kids interact (if you have kids this will be easy.) What makes them laugh? More importantly, what holds their attention? Is it words, visuals?
Keep it age-appropriate. A preschooler won’t grasp sarcasm, but a 10-year-old might. Don't go in blind.
Avoid complex language. Simple, clear sentences work best. If you're unsure, always go back to Cat in a Hat.
Who Chooses What To Read
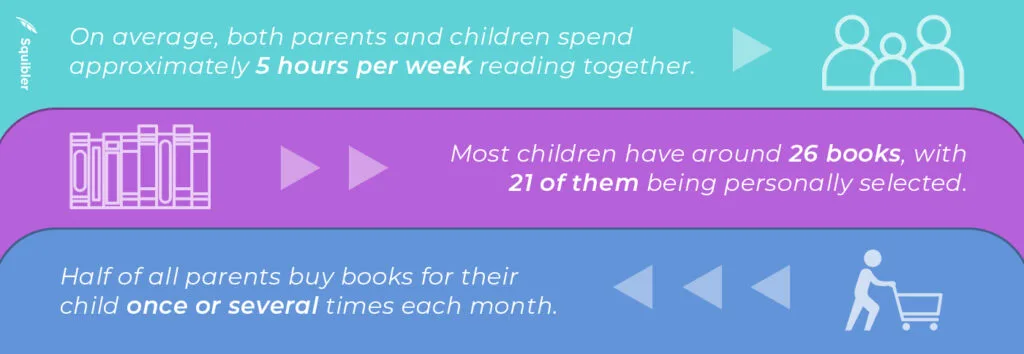
While children are the primary book audience, parents are the users. What I mean by that is, parents pick the books, even if the kid is the one who cries that they want one. So what do parents look for in a children's book? Most commonly educative and entertaining material that reinforces positive values, learning, etc. Naturally, that doesn't mean that a child will like what their parents pick. As such, it's worth pondering on what a child wants and what the parent wants.
2. Decide on Your Book’s Format, Length, and Layout
Children’s books come in many formats. So far I scratched the surface on the illustration vs text spectrum. But let's dig in deeper.
Different book formats offer different benefits depending on factors such as audience, but also your budget:
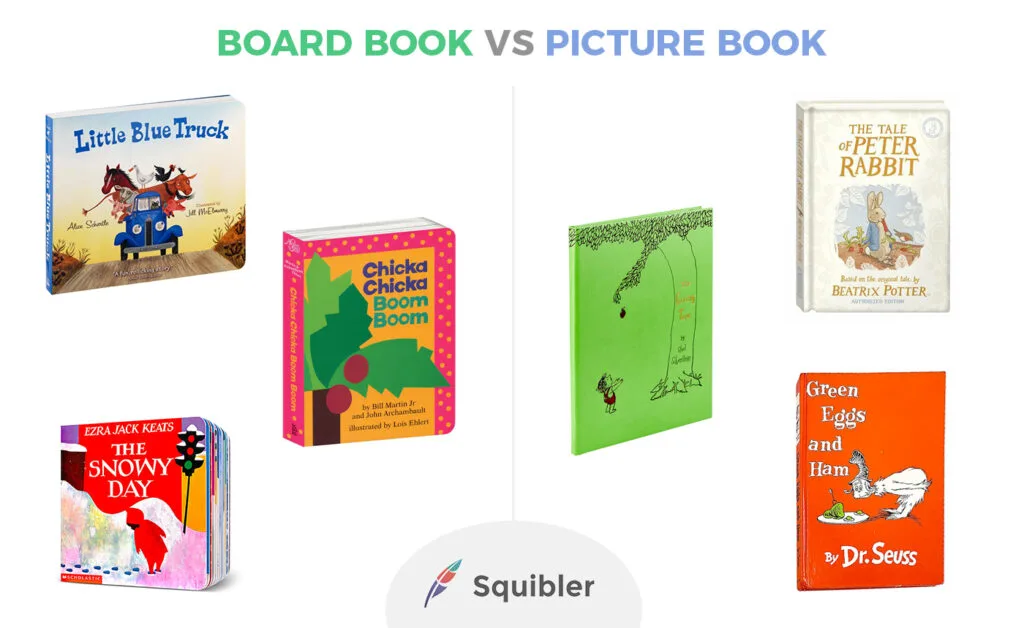
Board Books vs. Paperback
Board books are great because they durable and visually appealing. This is great for youngest readers who are having a hard time turning pages (age 0 to 3). But, such children's books are more expensive to produce.
Paperbacks are smaller, more affordable, and transportable, but also easier to tear. The youngest audience should be 4 year old, unless you don't mind your book being used more for fun shenanigans than actual reading and observing.
Interactive vs. Traditional
Lift-the-flap, pop-up books, and touch-and-feel elements make reading fun for younger readers. These features are pricey but add unique value to your book.
Understanding Word Count and Page Length
Now, let's cover page count. Although I advise you don't spend too much time thinking about it and focus on quality, it's good to have a basic idea.
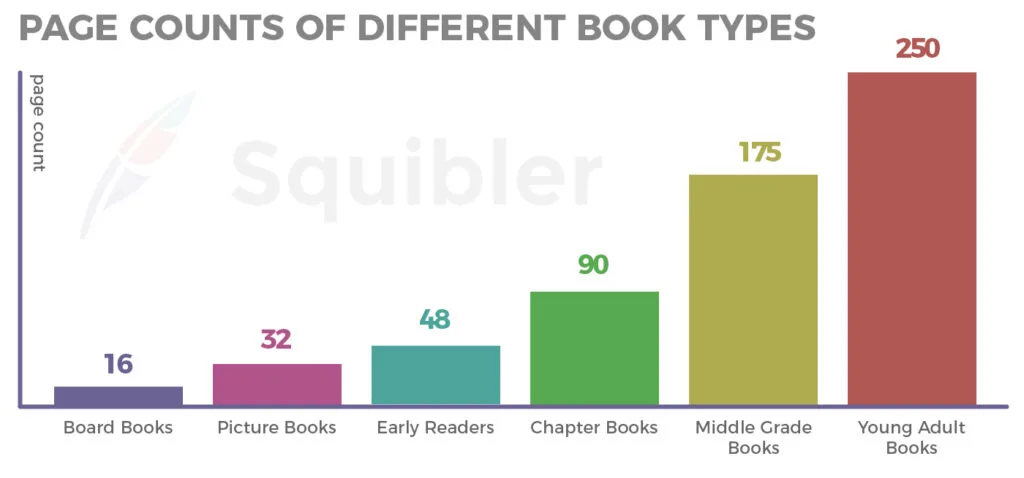
Board books: Range from 8-24 pages and contain minimal text, with 100 or fewer words per book.
Picture books: Contain 500-1,000 words and span 24-48 pages, with 32 pages on average.
Early readers: With 1,000-5,000 words and 32-64 pages, these books use large fonts and simple sentences.
Chapter books: These books range from 5,000-20,000 words and are about 80-100 pages long.
Middle-grade books: With 20,000-50,000 words and 100-250 pages, they explore more complex storytelling.
Young Adult books: YA novels range from 50,000-100,000 words and are at least 250 pages long.
Positioning Text and Illustrations
So far I talked about the ratio between illustrations and text. Now, let's go over combining the two to make an immersive experience for kids across different children's book types.
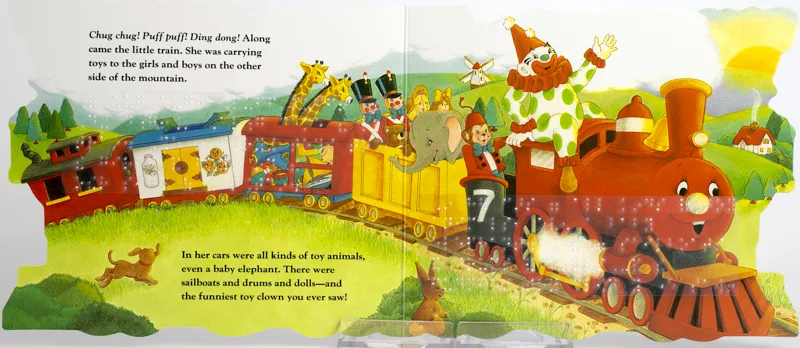
Board books use full-page illustrations with minimal text. Simple words or short phrases complement the artwork.
Picture books rely on illustrations to tell the story. Each page balances text and imagery but the highlight is still on visuals.
Early reader books is where text starts to take over. Such books have large fonts, short sentences, and wide spacing. There are illustrations, but visuals take on the supportive role.
Chapter books often use black-and-white illustrations that improve the story without dominating the page.
Middle-grade books have little to no illustrations. Sometimes you'll see visuals at the beginning of a chapter and it serves a decorative role.
Young adult books follow traditional novel formatting, relying on text to drive the story.
What Size, Shape, and Orientation Is Best?
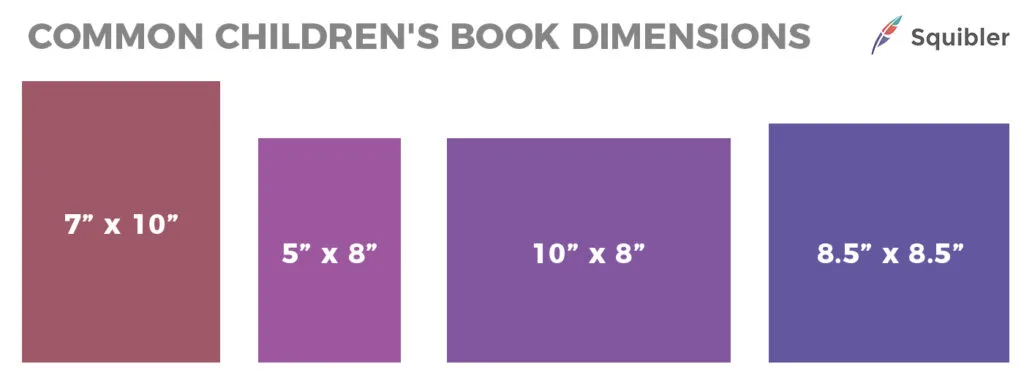
Choosing the size and shape for your book is the final part of the 2nd step. Square books are great for picture books as they provide a large space for illustrations. They are also easy to hold.
Classic rectangular shape is best for books with more text, such as middle-grade and young adults.
Popular formats are 8”x8” for square books, 8.5”x11” for standard picture books, and 5”x8” for chapter books.
3. Choose a Writing Style
Now that we have a better idea of creating a foundation for a children's book, let's talk about maxing the book yours. This is another fine line between make the book appropriate by sticking to standards but also adding your unique voice.
First, let's go over narration.
Narration
First-person vs. third-person. For younger children, third-person POV is more common. Older kids' and YA books you'll see more in first-person.
Rhyme vs. Prose. Although we see rhyming books more as for younger kids, they work well across all ages. However, they require extra work so you don't end up with a book full of forced rhymes and weird phrases.
Simple vs. Complex Language. Naturally, you want to keep it simple. But if you're writing a book for teenagers or above, don't be afraid to experiment. You need to keep yourself in check, which granted, isn't easy. To keep it short, simple language is the safe zone and the more you gear towards complex, it gets riskier.
Make the Book Readable
A book that’s fun to read is a book that kids will come back to. By playing with sound, pacing, and sentence structure, you can create an enjoyable rhythm. The younger the audience, the more repetitive it can be. Although not fun for adults, it will entertain kids if the rhythm is right.
I suggest using tools like Hemingway Editor or Grammarly for sentence structure, but also grammar.
4. Incorporate Key Elements
As you work through the entire process of creating a children’s book, understanding the key ingredients that make a story unforgettable can make all the difference. A powerful story idea is only the beginning—you need to weave together characters, dialogue, and emotion in a way that feels authentic to young readers.
Here are some essential elements to build a book that kids and parents will appreciate.
Dialogue That Sounds Natural
Dialogue brings your story to life. Think about the stories your own kids love. Children recognize when conversations feel real—capturing the rhythms and phrases they hear every day is essential.
Including realistic, age-appropriate dialogue shows you truly understand your audience and earns their trust—and often, their kind words when they fall in love with the story.
A Storyline Full of Adventure and Emotion
A great children’s book follows a meaningful path where characters face challenges and grow. From the first page to the last, obstacles keep readers turning pages. Additionally, children love characters who mirror their dreams, fears, and everyday experiences.
5. Creating Characters
Besides the story, characters are the most important part of almost any book. Similar to the story, children's book characters must be engaging but simple.
Think of The Cat in the Hat or Paddington Bear. Characters reflect real emotions, struggles, and growth, but keep it grounded to the kids' level.
Next, I'll go over finer details of character development with a checklist.
Character Development Checklist
When developing your character, check off the following questions:
What do they want? – You can give your children's book character a simple goal such as a bear getting honey.
What’s stopping them? – What's stopping the bear from getting the honey? Is it the bad bees? Or maybe the bees are worried and are afraid.
What makes the character stand out? – What is the one quirky habit that the bear has? Is he clumsy? Maybe he has a distinctive talking habit. When adding habits, don't overdo.
How does the character change? – Maybe in the beginning the bear is used to just taking what they want. But at the end of the story, they learn that talking and being nice is the way to go.
6. Blend the Components into a Cohesive Story
As with any other book, the characters, dialogue, storyline, and action all need to sync up to create an enjoyable children's book.
Stories begin with the characters, but they can’t come to life without meaningful dialogue. Meaning doesn't equals complex. Even simplest sentences can create a meaningful message.
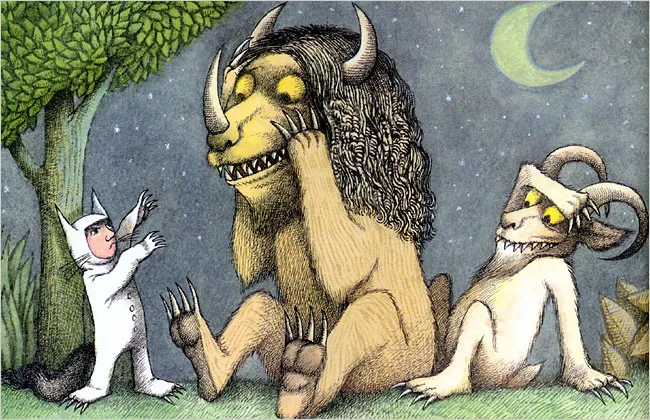
In Where the Wild Things Are by Maurice Sendak, Max’s interactions with the Wild Things develop his journey and furthers the plot. As the story builds, the interactions create a sense of momentum that moves the story from one scene to the next.
Another example is Charlie and the Chocolate Factory. The story starts with Charlie receiving the golden ticket and him going to Willy Wonka’s chocolate factory. But it's the blend of weird and funny characters and how they talk that wraps up the overall experience.
7. Decide on a Book Title
The title plays a bigger role in classic novels, but is important for children's books as well. The younger the audience, the bigger impact the visuals have. And as the audience gets older and books become more text-heavy, the bigger impact the title has.
A great title gives readers a sense of what the story is about.
When brainstorming titles, think about the themes, characters, and emotions that define your story. Here, you again need to consider both the child and the adult. The parent is the one picking the book, so you want a title that catches their attention.
For example, The Giving Tree by Shel Silverstein connects with both kids and adults.
Get feedback from friends, family, or even writing groups to see which title resonates most with people who represent your target audience.
4 Do’s When Writing a Children’s Book Title
Use Alliteration. Titles like Big Red Barn or Froggy Gets Dressed are fun to say, memorable, and help children connect with the story. The rhythmic repetition makes them easy to recall.
Ask a Question. A title that poses a question, like What If…? (by Samantha Berger), piques curiosity and invites readers to seek the answer within the pages.
Incorporate Humor. Titles like The Book with No Pictures by B.J. Novak play with expectations and the humor within the book's content.
Be Cautious with Puns and Wordplay. While clever puns and wordplay often amuse adults, they don’t always resonate with young readers.
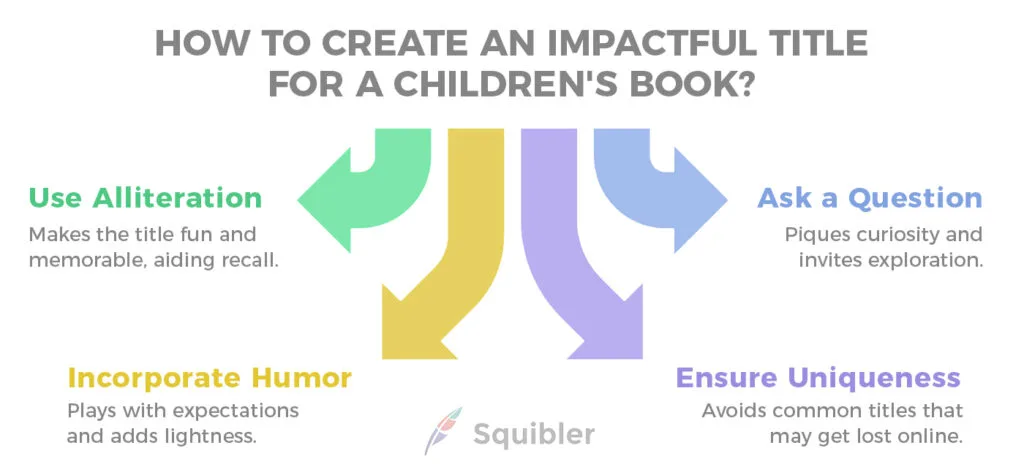
Lastly, conduct a quick online search to ensure your title isn’t already widely used. A title that’s too common might get lost among others, so aim for something distinctive and relevant to the content of your book.
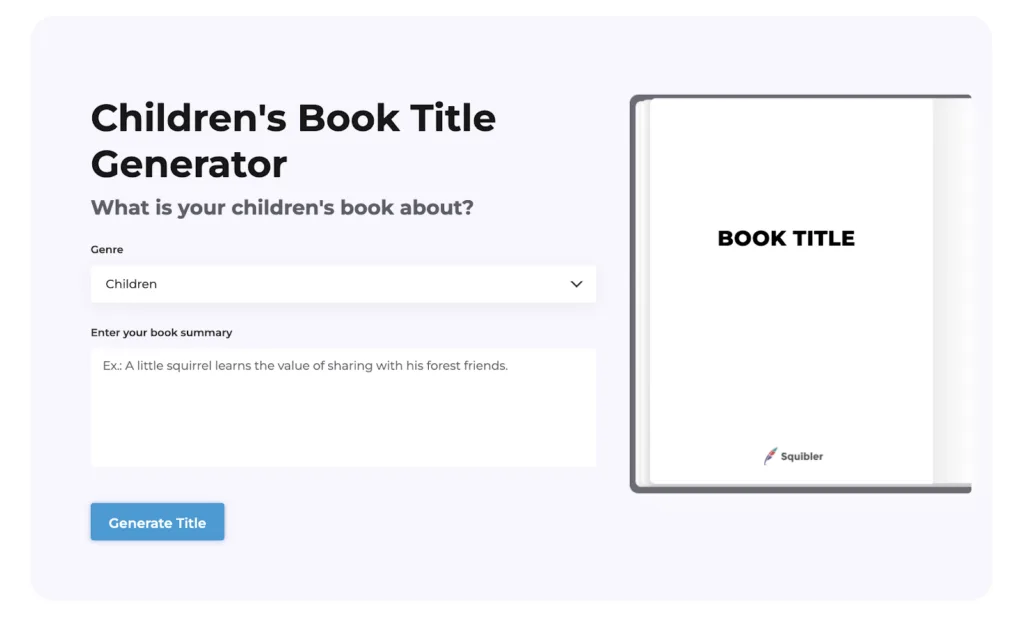
If you need help coming up with a title, Squibler’s Children’s Book Title Generator can assist.
8. Find an Illustrator and Editor - Simple Guide
We know by now that illustrations are more than just decorations in children's books. So you need to make it count.
If you can't do it yourself or you don't know someone who can helps with illustrations, you'll need to find the right person for the job.
Let's go over the process of finding the right illustrator for a children's book.
Finding the Right Illustrator
First and foremost, you obviously want an illustrator that has experience with children's books.
The next step is to be transparent about your expectations, budget, timelines, and the revision process. The relationship between you and the other professional sets up foundation for how your book will turn out.
I can't stress this enough. You need to be transparent and find a collaborator who'll do the same. Figuring out if the person is the right pick is a process, but is a process that's better to finish during the creation process and not when the book is out for publishing.
Behance and Dribble are solid websites for exploring illustrator portfolios. You can also check Fivver and Upwork if you're on a tight budget.
Finding an Editor
The similar process if for finding an editor.
Here's some unique things to consider:
Developmental editors assess the overall structure, pacing, character development, and whether the content is age-appropriate. For children’s books, this helps you understand if your story is engaging and understandable for the targeted age group.
Copy editors focus on grammar, sentence structure, and clarity, adjusting the language to suit the developmental stage of your audience.
Proofreaders catch minor errors before your book is ready for publication.
Finding an editor can be done through platforms like Upwork or BookBaby.
You can also turn to organizations like SCBWI (Society of Children’s Book Writers and Illustrators) or the Editorial Freelancers Association, which offers directories of qualified editors.
Legal Agreements and Copyrights
When hiring an illustrator or editor, have clear legal agreements in place. In children’s publishing, “work-for-hire” contracts are standard. This way you retain full rights to the artwork or edited material.
Without an agreement, the illustrator may legally own the images, which could limit how you use or distribute your book. Always clarify copyright ownership, licensing rights, and payment terms upfront to avoid future conflicts.
9. Create a Book Dummy
Creating a book dummy is a step unique to children's books. A book dummy is a first draft of your book in physical form. The goal here is to visualize how the text and illustrations will look.
To make a book dummy, start by folding sheets of paper to match the number of pages in your book. Number the pages and lightly sketch rough illustrations or placeholders to represent image placement. Write or paste your text into each page, considering how much should appear before a reader turns to the next spread.
Remember, you're not creating a first draft that's ready to publish. You create the book dummy at home with paper, scissors, and a pen.

As you flip through the dummy, pay attention to the rhythm. Does the pacing hold a reader’s interest?
If you want to make it digital, I suggest tools like Canva or Adobe InDesign.

Taking the time to create a book dummy can help prevent costly revisions later.
10. Publish Your Book
The big, final step. Publishing your children's book. There are two main paths you can take. The traditional publishing route and the self-publishing route. Let's cover both.
Traditional Publishing
Traditional means submitting your children's book to publishing companies like Penguin Random House, HarperCollins, or Simon & Schuster. If they accept your work, the publisher handles editing, cover design, marketing, and distribution.
This path requires no upfront costs, provides access to industry experts, and offers wider bookstore and library distribution. But, it's highly competitive, with publishers receiving thousands of submissions and accepting only a few.
So it can be painless or very exhausting. Finally, if you secure a deal, you’ll have less creative control, as publishers make the final decisions.
Finally, it takes over a year from acceptance to release, and you'll probably earn lower royalties. The publishing company is the megaphone you're paying. Not directly, but through earned royalties.
Self-Publishing
Self-publishing, on the other hand, gives you full control. Platforms like Amazon Kindle Direct Publishing (KDP), IngramSpark, and Barnes & Noble Press allow authors to release their books without waiting for a publishing house.
Besides more control, self-publishing has better royalties. Up to 70% of book sales. The process is also much faster.
The downsizes are that you’ll need to cover upfront costs for editing, illustrations, and formatting. You'll also have a more limited access to physical bookstores and libraries. Finally, building visibility and driving discovery depends on your effort.
Still, self-publishing success stories exist—books like P is for Pterodactyl by Raj Haldar and The Rabbit Who Wants to Fall Asleep by Carl-Johan Forssén Ehrlin.

Tips for Writing your Children’s Book
Now, I'd like to end the article with some tips and templates that you can use for free when writing your children's book.
A new writer might not realize how important the inciting incident is for kids books. In the first week of your writing journey, brainstorm not just a book idea and the main characters, but also a surprising event that sets the whole story in motion.
Consider both your preferences and the interests of your intended audience. A blog post discussing kids’ favorite books can offer valuable insights into creating a children’s book that resonates.
With Squibler, you can streamline the writing process, generate ideas, and structure your book. I suggest trying it out for your brainstorming process and overall flow.
Looking for free templates? I suggest you check out this site for some great children’s book templates.
FAQs
Here are answers to the questions regarding how to write a children’s book:
Is it hard to write children’s books?
Yes, writing a children’s book can be challenging. Authors must consider their audience’s developmental stage, ensuring themes and characters resonate with the target age group.
They must also strike a balance between simplicity and depth, and craft a story that is engaging both in narrative and visual appeal.
How many pages should a children’s book have?
Page count varies by book type. Picture books typically have 32 pages, while board books are shorter, ranging from 10 to 24 pages. Chapter books generally fall between 32 and 100 pages.
How long does it take to write a kid’s book?
The timeline for writing a children’s book varies depending on factors like how complex the story is, the author’s experience, and the age group you’re writing for.
A picture book might only take a few weeks to draft, while a more detailed story could take several months. But with Squibler, you can get started right away–whether you’re creating an outline or writing a whole story.
How much does it cost to print a children’s book?
Printing costs depend on factors such as page count, print run size, and printing method (digital or offset). For example, a 32-page children’s book might cost $3–$7 per unit for a print run of 250 copies, with costs decreasing for larger print runs—around $2.05 per unit for 2,500 copies.